Handle a maintenance request, photo-first
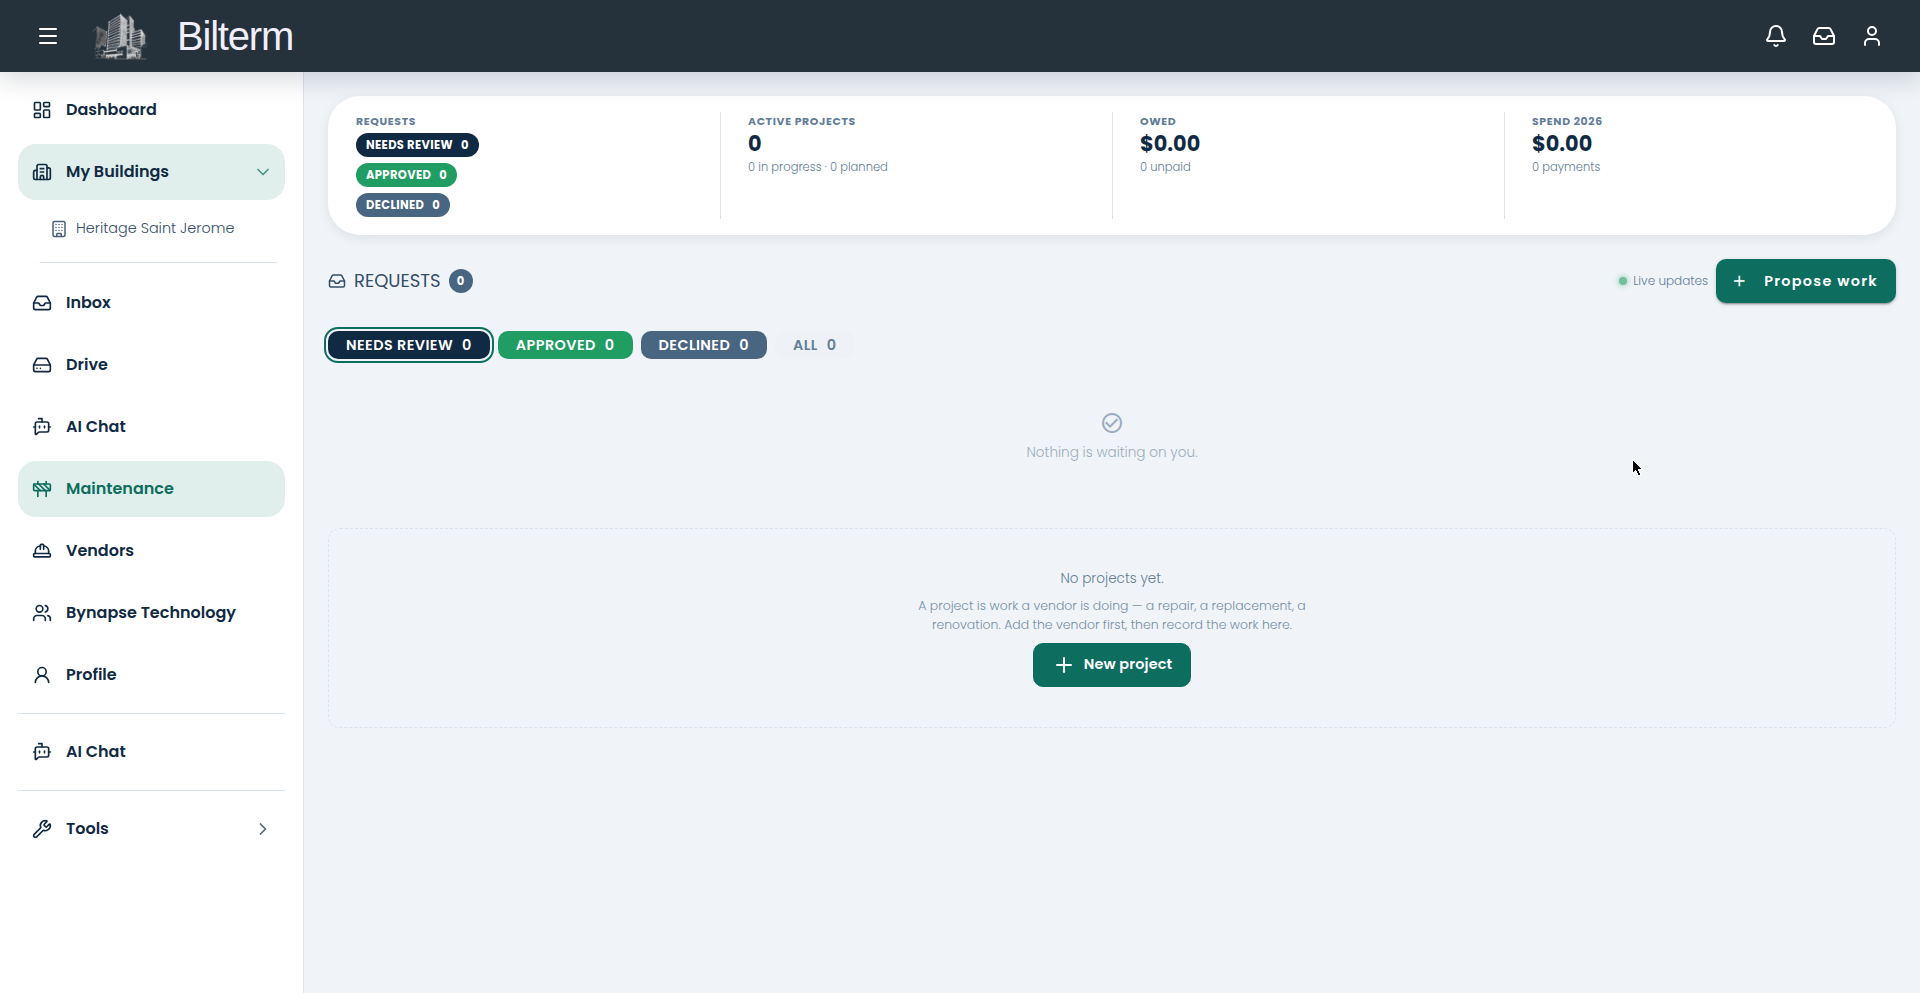
Maintenance requests with live status updates.

Every repair in Bilterm starts as a request and moves through a visible pipeline: Requested → Needs Review → Approved → (Declined). Photos first, paperwork later.

  1. Go to Maintenance. The metrics strip shows requests, needs-review, approved, declined, active projects, amounts owed, and year-to-date spend.
  2. Click Propose work.
  3. Pick the Building, then the Unit — “Pick the apartment when the problem is inside it.”
  4. Set Requested by: “The tenants on the unit’s current lease, or us.”
  5. Describe What needs doing (required), set the Priority (defaults to Medium), and add an Estimated cost — “A guess is fine — approving is where it gets committed to.” Add Details as needed.
  6. Attach photos of the problem before you hit Send for review. A photo of the leak beats three paragraphs about the leak.
  7. Track the request on the Maintenance page as it moves through the tabs: Requests, Needs Review, Approved, Declined, All. Status updates arrive live.

Tips

  • Bigger jobs — a roof section, a bathroom gut — belong in projects, not single requests. Group the related requests under a project with an agreed amount and due date.
  • When the work is done, attach proof-of-work photos before closing it out. Your future self, reviewing a contractor dispute, will thank you.
  • Requests with no photos get deprioritized in practice. Make photos the habit for everyone who reports issues — a picture in the inbox thread takes ten seconds.
Read the rent ledger (who owes you money)

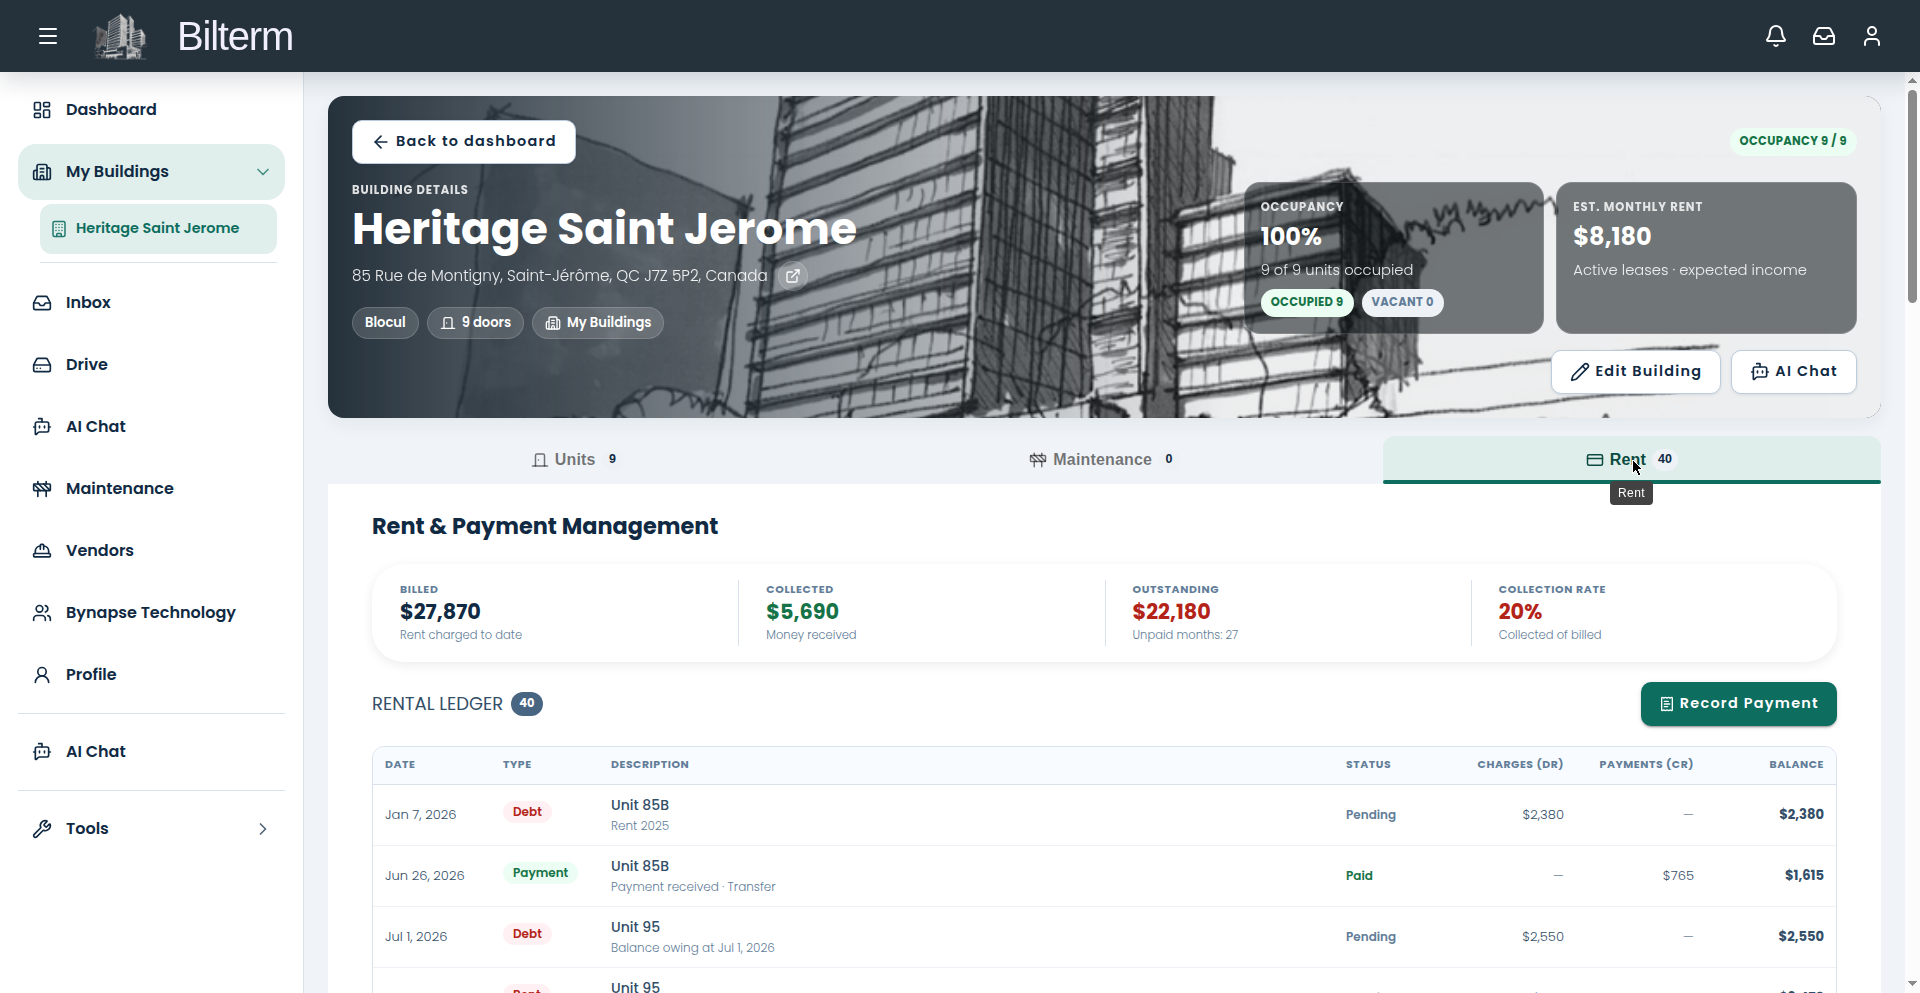
The rent ledger: billed, collected, outstanding, and collection rate.

“Who owes me money?” The answer lives on the building’s Rent tab. Learn to read it and you’ll never guess again.

  1. Open the building and go to the Rent tab.
  2. Read the four headline figures first: Billed (total charges), Collected (total payments), Outstanding (the difference), and Collection Rate (collected as a share of billed).
  3. Scroll to the Rental Ledger table. Each row is one entry with: Date, Type (Debt, Rent, or Payment), Description (e.g. “Unit 85A, J. Tremblay — Aug 2026”), Status (Paid or Pending), Charges, Payments, and the running Balance.
  4. Filter by lease to see one tenancy’s full history, or by status to isolate everything still Pending.
  5. Use the per-row action menu for row-level operations (open, edit, or reverse an entry).

Tips

  • Outstanding is the number that matters month to month. If it grows three months in a row, you have a collections problem, not a bookkeeping problem.
  • The Collection Rate is your building’s report card. Anything under 90% deserves a plan, not a shrug.
  • A note on the AI assistant: it can’t read the ledger yet. “Who owes me money” is a ledger question — come here, not the chat.

Record rent payments and charges

The rent ledger: billed, collected, outstanding, and collection rate.

Bilterm’s rent ledger is manual: you record each payment and each charge. That sounds old-fashioned, but it means the ledger always matches reality — no sync surprises, no duplicate transactions.

  1. Open the building and go to the Rent tab — “Rent & Payment Management.”
  2. Click Record Payment.
  3. In the dialog, pick the Lease the payment belongs to (the picker shows current leases, e.g. “Unit 93 · Sep 20, 2026 – Sep 19, 2027”).
  4. Enter the Amount received and the Date received (calendar picker) — both required.
  5. Choose the Payment Method: Transfer, Cheque, Cash, Card, Digital wallet, or Other. Save.
  6. To bill something — monthly rent, a fee, an adjustment — use the record-charge action instead. It creates a debt entry on the same ledger.
  7. To forgive an amount, use Waive debt. The waiver is recorded with an audit trail rather than silently deleting the charge.

Tips

  • Record payments the day they arrive. A ledger that’s a month behind is a ledger you stop trusting.
  • The Payment Method field is worth filling in honestly — when a tenant disputes a payment six months later, “Cash, recorded same day” settles the argument.
  • Waiving is better than deleting. A waived debt shows the full story; a deleted charge looks like the books were cooked.

Invite tenants to the tenant portal

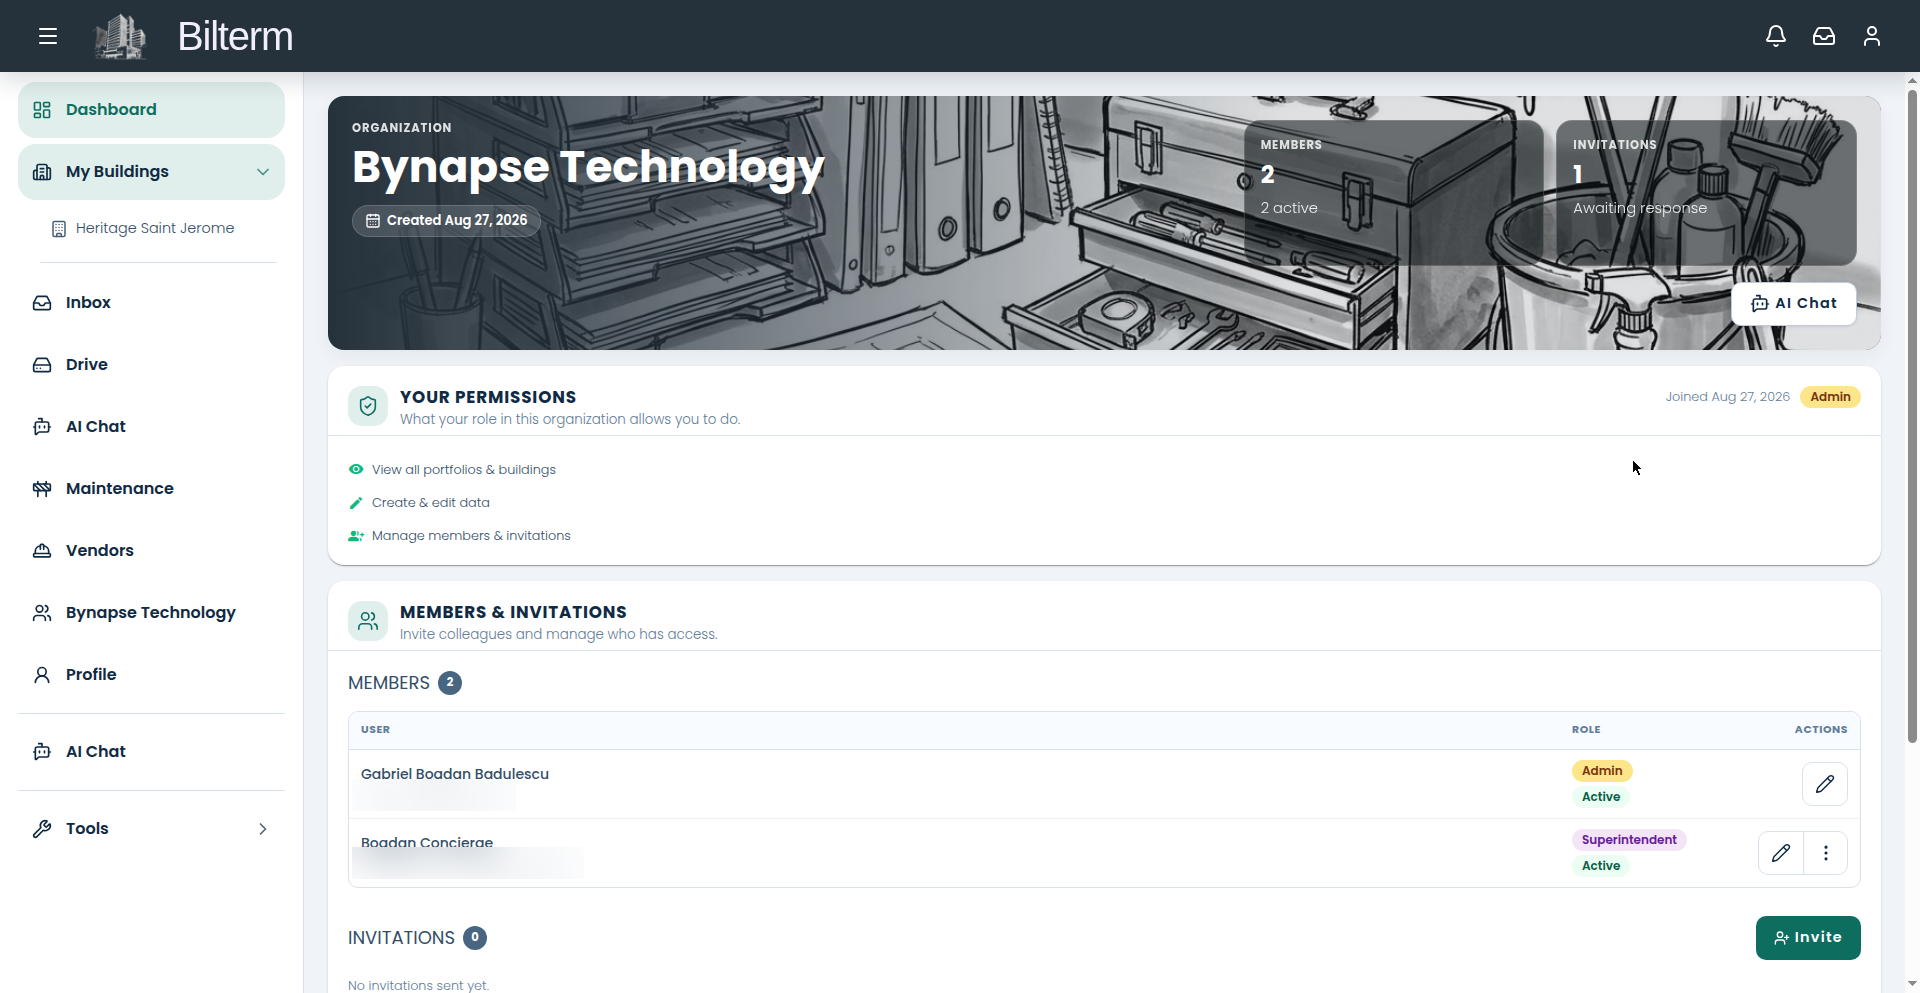
Team page screenshot with member and tenant email addresses blurred out

The tenant portal gives each tenant a simplified space of their own: their rent ledger and payment history, the documents you’ve shared with them, and their signed lease. No password to forget — they sign in with a magic link.

  1. Go to Team and open the Tenants section. This is where tenant invitations live, separate from team member invitations.
  2. Send an invitation to the tenant’s email address. They receive a link that signs them in directly — no password to create or remember.
  3. Each invitation shows its status. While it’s pending you can Re-send it; if a tenant moves out or shouldn’t have access, Revoke it. Access stops immediately.
  4. Share documents with the tenant from Drive or the lease record — shared files appear in their portal automatically. The signed lease is the obvious first one.

What the tenant sees

  • Their own rent ledger: charges, payments, and current balance for their lease.
  • Payment history for the tenancy.
  • Documents you shared with them, including the signed lease.

Tips

  • Invite tenants when the lease is signed, not months later — it cuts the “can you send me my lease again?” emails to zero.
  • A revoked invitation is not a deleted tenant. The tenant record, lease history, and ledger stay intact; only portal access is removed.
  • Tenants can’t see other units, other tenants, or anything about your portfolio. The portal shows exactly one tenancy: theirs.

Create a lease and link a tenant

A lease in Bilterm connects three things: a unit, a tenant, and the terms. Create it once and the rent ledger, the unit card, and the tenant record all pick it up.

  1. Go to Leases and start a new lease.
  2. Choose the unit the lease covers. The lease-to-unit linkage is what drives the building’s occupancy counters and the unit card’s “lease end” display.
  3. Choose the tenant — pick from the tenant directory or add them as you go.
  4. Enter the lease dates and the monthly rent, then save. The lease now appears in the lease list and on the unit’s Lease tab.
  5. Open the lease detail page. This is where you’ll find the TAL form links — Tribunal administratif du logement forms one click away — and where every change to the lease is recorded in the lease-updates feed.
  6. Watch the renewal alerts: Bilterm flags leases 3 to 6 months before expiry, so the notice window never sneaks up on you.

Tips

  • Québec leases have no security deposits, and Bilterm has no deposit fields — don’t go looking for them.
  • Old leases stay on the record as historical tenancies. Never delete a lease to “fix” it; end it and create the new one, so the history and the ledger stay consistent.
  • Attach the signed lease PDF to the lease record (or in Drive under the unit’s folder) so it’s there when the tenant asks for a copy — and share it with them through the tenant portal instead of emailing it around.

Add your first building and units

Building detail page screenshot showing unit cards with tenant names blurred out

Everything in Bilterm hangs off the building-and-unit structure: leases attach to units, the rent ledger rolls up to the building, maintenance is filed per unit. Set this up first and the rest falls into place.

  1. Go to My Buildings (the portfolio overview) and click Add building.
  2. Work through the guided setup: building name, address, and a photo. Add the building metadata you have — roof age, boiler type, tax ID — in the detail fields; you can fill in the rest later.
  3. Open the new building. The detail page shows a map card, a KPI strip, and three tabs: Units, Maintenance, Rent.
  4. On the Units tab, click Add New to create your first unit.
  5. In the Add New Unit dialog, enter the Unit Number (required), plus Type, Level (defaults to Ground Floor), and a Description. Save.
  6. Repeat for every unit in the building. Each appears as a card showing photo, rent per month, status chip, bedrooms, floor, tenant, and lease end.
  7. Use the sort and filter controls — by floor, by problems, by lease status — and the unit search once the list grows.

Tips

  • Add all units before creating leases: the lease form attaches to a unit, and it’s faster when the full list exists.
  • Unit numbers are the backbone of the ledger descriptions (e.g. “Unit 85A, J. Tremblay — Aug 2026”), so use the numbering your tenants actually recognize.
  • The building’s Files & Photos section is a good home for the deed, insurance certificate, and exterior photos — click Add file while you’re setting up.